Version 1.1.0
RowerCore is a companion app for FTMS-compatible rowing machines. It connects over Bluetooth, guides you through structured workouts and progressive multi-week training schedules, and tracks every session in your personal history.
RowerCore communicates with any rowing machine supporting the FTMS (Fitness Machine Service Profile) Bluetooth standard.
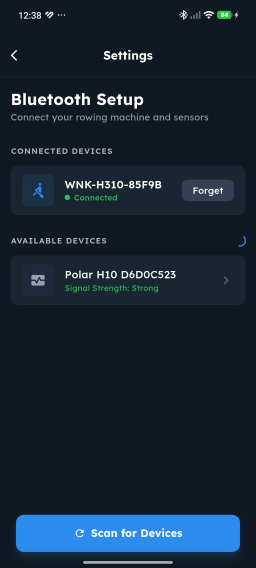
To connect your rower for the first time:
Once a device is saved, RowerCore automatically connects to it whenever the app is opened and the machine is awake.
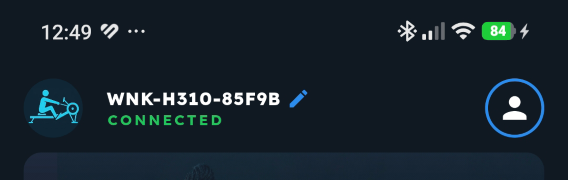
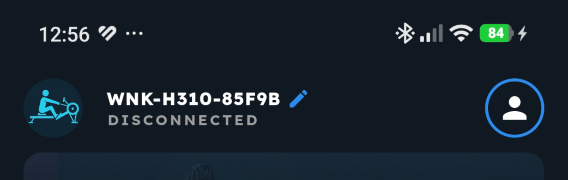
Connection status is displayed in the top bar of the Home screen:
RowerCore supports standard Bluetooth heart rate monitors (chest straps or armbands) implementing the standard Heart Rate Service profile. Connect your HRM via Settings → Devices → Manage Devices to stream and record live heart rate data during sessions.
Rowing machines differ fundamentally in how resistance is generated—magnetic, water, or air dampers provide radically different resistance curves. Setting a machine to "50%" on an air rower behaves entirely differently from "50%" on a magnetic rower.
Baseline Resistance represents your biomechanical reference resistance—the sweet spot where your stroke length and leg drive produce optimal work without overloading your lower back.
To calibrate your personal baseline:
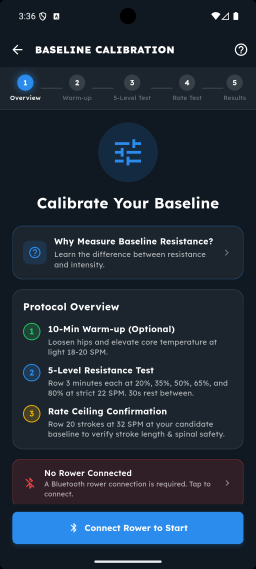
Tip: If you skip calibration, RowerCore applies safe standard baseline defaults (45% for men, 35% for women). Calibrating your baseline ensures all multi-week training schedules scale accurately to your physiology.
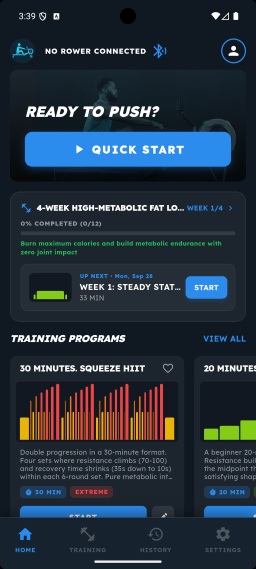
The Home screen is your command centre, providing quick access to active workouts, progressive plans, and past statistics:
| Section | Description |
|---|---|
| Header bar | Shows the saved device name and connection indicator. Tap to open Device Management. Tap the circular avatar to view your Profile. |
| Hero banner | Features a bold QUICK START button to start an immediate free-row workout. |
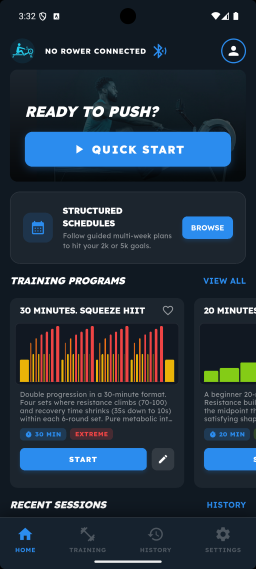
| Structured Schedules | Shows either an introductory card with BROWSE to discover multi-week plans, or your Active Schedule Card with current week progress and up-next workout. |
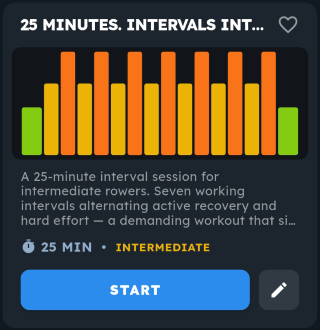
| Training Programs | A horizontal strip of your individual workout cards. Tap VIEW ALL to open the full Training Library. |
| Recent Sessions | A horizontal strip of your latest completed workouts with quick stats. Tap HISTORY to see full workout logs. |
When no schedule is active, the Home screen displays an invitation card:
Once you start a schedule, the card dynamically adapts into an Active Schedule Dashboard:
0% COMPLETED (0/12)).WEEK 1/4).Each card in the Training Programs horizontal strip highlights:
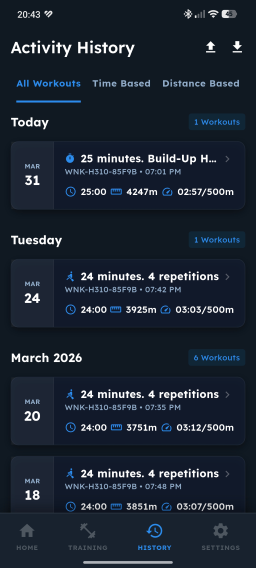
Displays your most recent workouts with completion date, total distance, elapsed duration, and calories burned. Tap any card to open detailed splits and telemetry charts.
Quick Start allows you to start rowing immediately without interval constraints.
Steps:
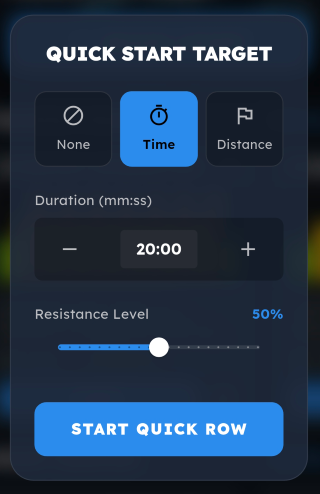
During Quick Start, the app monitors all live telemetry (stroke rate, power, pace, split time, calories, and heart rate). Tap Finish at any time to end and optionally save the session to your history.
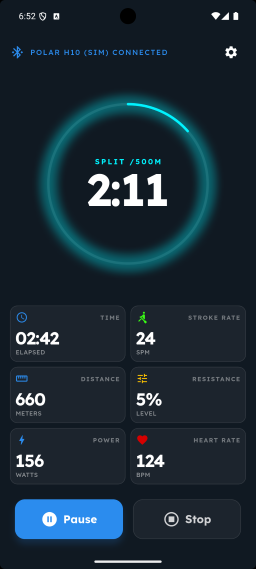
Structured Schedules are guided, multi-week training plans (typically 4 to 8 weeks) engineered around periodized training science. Instead of random one-off sessions, schedules provide progressive overload, aerobic base building (UT2 steady state), anaerobic threshold development, and scheduled recovery days to prepare you for specific goals (such as a 2,000m or 5,000m test).
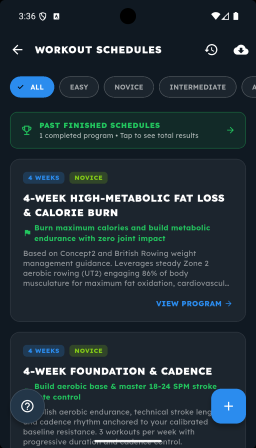
Tap the ? button at the bottom-left of the Workout Schedules screen to open the Structured Schedules Guide:
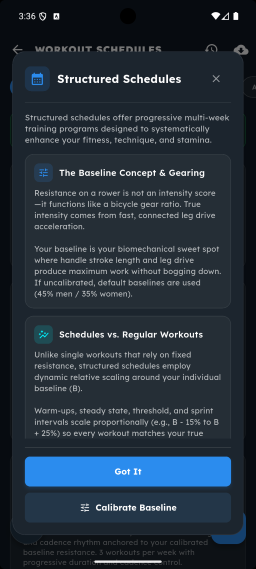
Key principles explained in the guide:
On the Workout Schedules screen (/schedules):
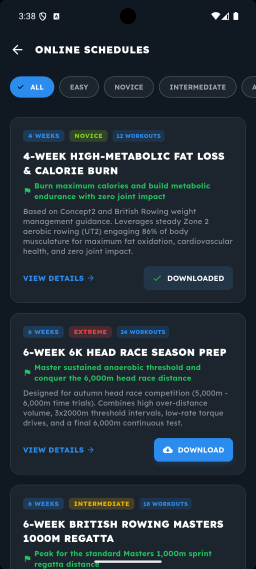
ALL, EASY, NOVICE, INTERMEDIATE, ADVANCED, and EXTREME.4 WEEKS), difficulty tag, total workout count (e.g. 12 WORKOUTS), goal headline, and description.?): Re-opens the Structured Schedules guide and baseline calibration prompt.+): Opens the Schedule Builder to design a custom multi-week plan.Tap the cloud download icon in the top-right corner of the Workout Schedules screen to access Online Schedules:
Tap the + button on the Workout Schedules screen to open Create Schedule:
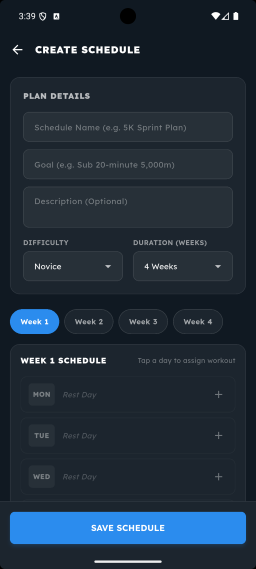
Week 1, Week 2, etc.) to configure each week individually.MON through SUN) defaults to a Rest Day.When you select a schedule and tap VIEW PROGRAM, the detailed Program Timeline opens:
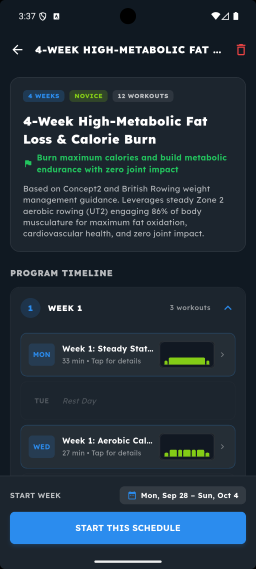
Mon, [Date] – Sun, [Date]) so your workouts match your actual routine.When all workouts in a schedule are completed, the program moves to your Past Finished Schedules archive.
Tap PAST FINISHED SCHEDULES (or the trophy banner) on the Workout Schedules screen to open the Finished Schedules list, then tap VIEW COMPLETE OVERVIEW to review your achievement:
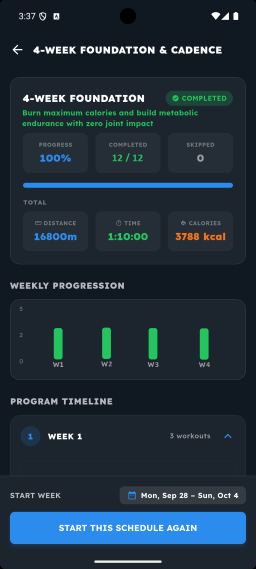
Access your saved training workouts by selecting VIEW ALL on the Home screen or switching to the Training tab in the bottom navigation:
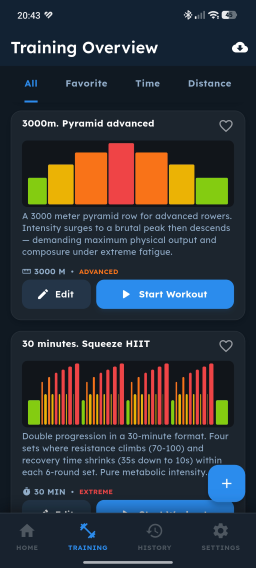
Filtering:
Actions:
Tap the + button in Training Overview to open the New Training Program wizard:
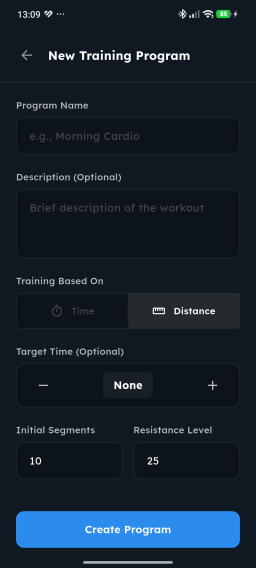
| Field | Description |
|---|---|
| Program Name | Title for the program (e.g., "Pyramid Power"). Required. |
| Description | Optional notes explaining the session's training focus. |
| Training Based On | Time (sections defined in seconds) or Distance (sections defined in metres). |
| Target Time (distance only) | Optional overall target duration used for progress pacing. |
| Initial Segments | Number of interval blocks to generate automatically (1–100). |
| Resistance Level | Starting resistance percentage applied across initial segments. |
Tap Create Program to open your new workout in the Training Builder.
The Training Builder gives you granular control over every interval block:
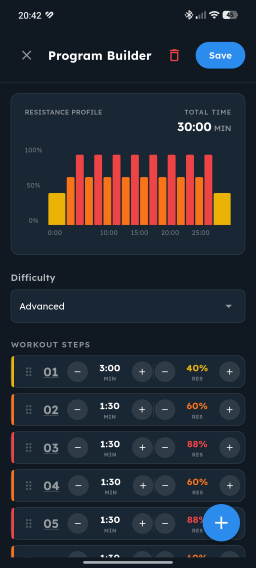
Editing an Interval: Tap the section number or card to open the Edit Section dialog:
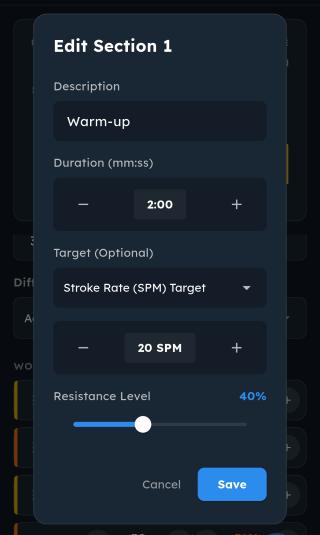
| Parameter | Description |
|---|---|
| Resistance (%) | Resistance level setting for this section. |
| Duration / Distance | Duration in seconds or distance in metres. |
| Target SPM | Optional target stroke cadence (strokes per minute). When set, the workout screen displays the live Target SPM Overlay. |
| Target Time (distance only) | Optional target duration for distance segments, enabling pace pacing bars. |
| Description | Short interval label shown during the workout (e.g., "Warm-Up", "Work Interval", "Active Recovery", "Cool Down"). |
Reorganising Sections:
Tap Save in the app bar to commit your changes.
Browse and download curated individual training programs created by rowing experts via Training Overview → Cloud Icon:
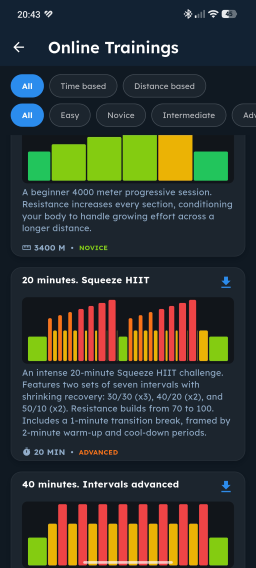
Time based, Distance based), Range (duration or distance buckets), and Difficulty (Easy to Extreme).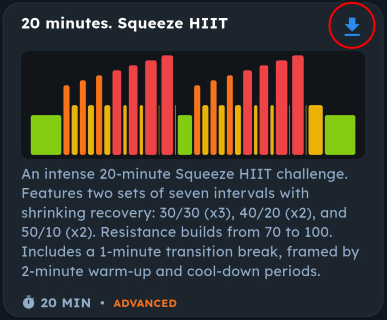
Starting a workout automatically switches the app into full-screen landscape orientation and keeps your screen awake for the duration of the row.
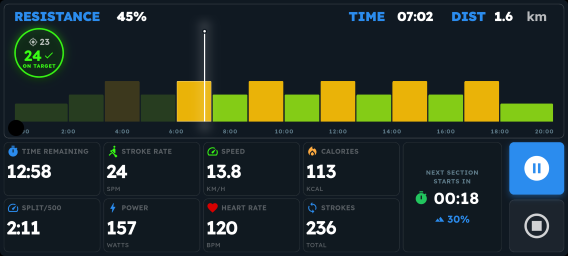
The workout display is optimized for high visibility from the rower seat:
Top Area — Profile Chart & Interval Header
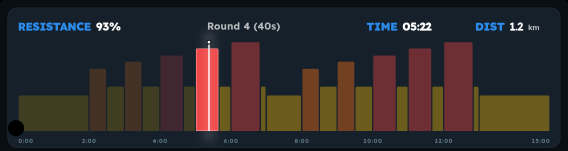
Bottom Area — Telemetry Grid & Controls

When the active workout segment includes a programmed Target SPM, a dedicated circular HUD widget appears on the upper-left of the chart:
24 SPM).As an interval approaches its end, an optional circular countdown overlay appears in the centre of the screen:
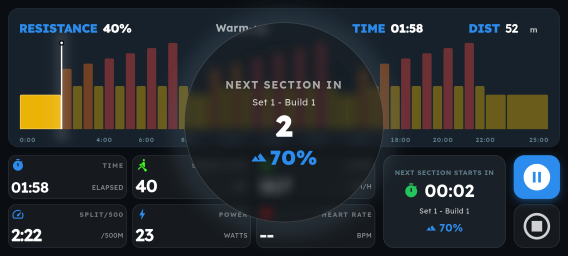
When you start a session, RowerCore presents a "Begin rowing to start the session" prompt:
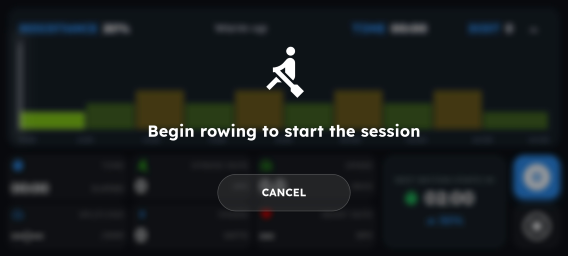
The workout clock does not begin until the first stroke is detected from your machine's flywheel sensor, ensuring you have time to strap in and grip the handle.
Tap Pause to halt the timer, workout chart, and interval countdown. A semi-transparent overlay confirms the paused state. Tap Resume to continue rowing, or tap Finish to end the session early.
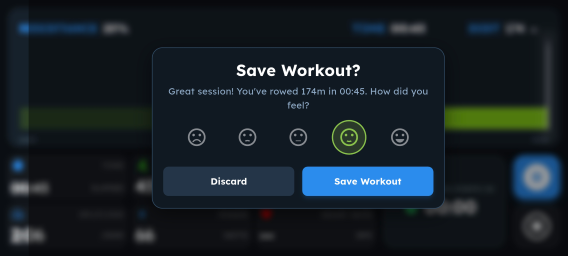
When the final interval concludes (or when you tap Finish), the Workout Completion Dialog appears:
The History tab (clock icon in the bottom navigation) logs all completed sessions in reverse chronological order:
Tap any workout entry to open the full Session Detail breakdown.
The Session Detail screen provides comprehensive analytical telemetry:
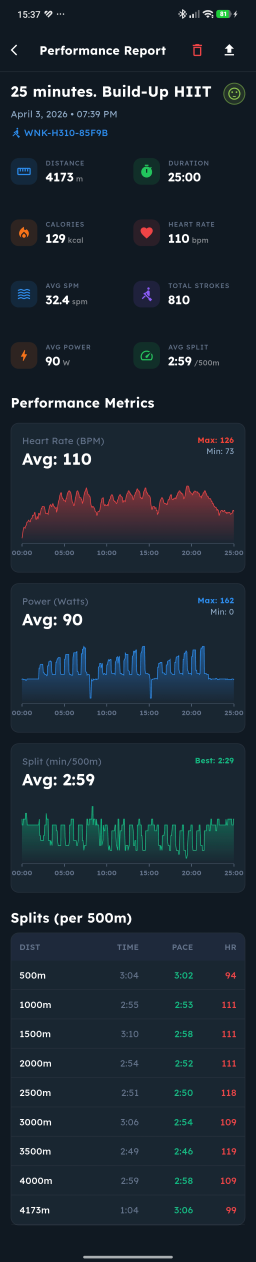
Tap any metric card in Session Detail to open Metric History:
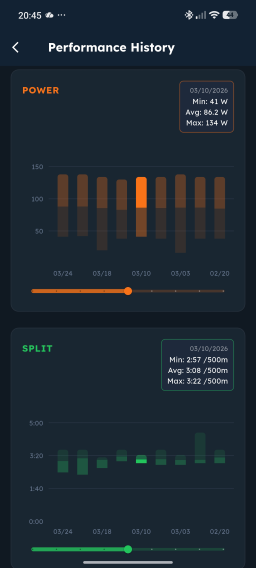
Plots that specific metric across your entire training history, allowing you to track long-term improvements in endurance, power output, and cardiovascular efficiency.
Access your profile via the circular avatar icon in the Home screen header or via Settings → User → Profile:
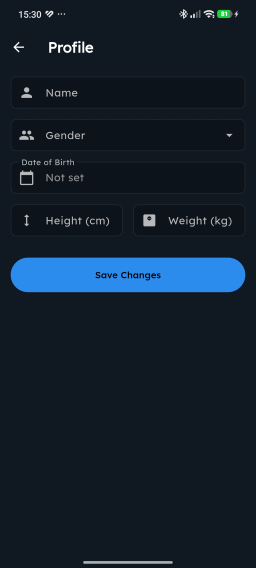
| Field | Purpose |
|---|---|
| Name | Displayed in workout summaries and completion greetings. |
| Weight (kg) | Critical for accurate metabolic work and calorie expenditure calculations. |
| Height (cm) | Used for biomechanical stroke length estimations. |
| Age | Used for automated heart rate zone calculations (Max HR estimation). |
Tap Save to update your settings.
Access Settings by tapping the gear icon in the bottom navigation bar:
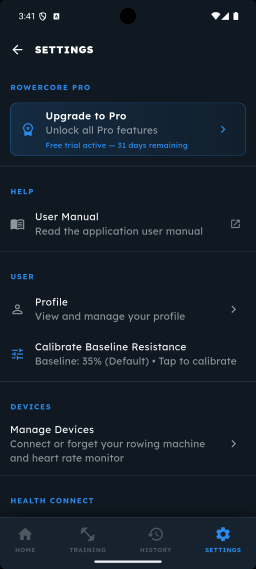
Displays your subscription tier and active trial countdown (e.g., Free trial active — 31 days remaining). Tap the banner to open the upgrade screen.
Tap User Manual to open this documentation directly in your mobile browser at any time.
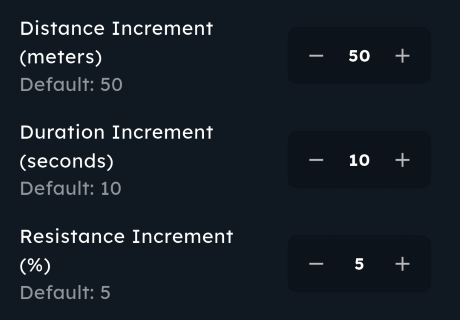
Baseline: 35% (Default) or Current: 42%). Tap to launch the interactive 5-step calibration test.08:00 AM). When enabled, RowerCore sends a motivational reminder on mornings where a scheduled session is planned.Customise the adjustment step sizes for the + / − stepper buttons inside the Training Builder:
| Parameter | Default |
|---|---|
| Distance Increment | 50 metres |
| Duration Increment | 10 seconds |
| Resistance Increment | 5 % |
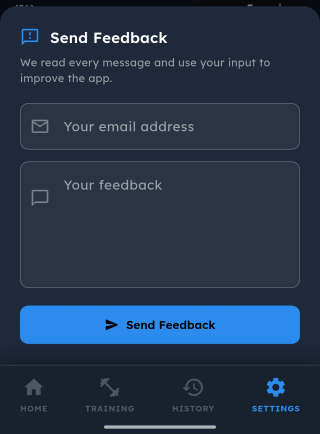
RowerCore includes a full-featured 31-day free trial unlocking all premium functionality from day one.
After the trial period concludes, the following plan terms apply:
| Feature | Free Plan | Pro Subscription |
|---|---|---|
| Custom Training Programs | Up to 2 programs | Unlimited |
| Session History Visible | 2 most recent sessions | Full History & Trends |
| Online Training Downloads | Up to 5 workouts | Unlimited |
| Structured Schedules | Standard catalog | Full Access & Custom Builder |
| Data Export & Health Sync | Standard | Full Access |
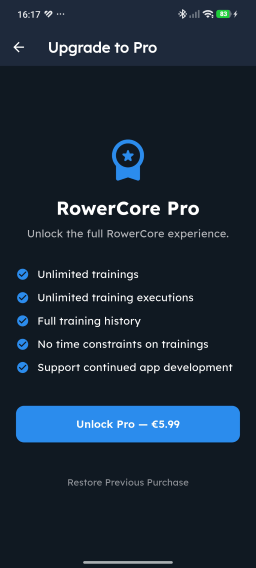
To upgrade at any time, tap the Upgrade to Pro card in Settings:
Q: What is the difference between an individual Training Program and a Structured Schedule?
A: An individual Training Program is a standalone single-session workout with predefined intervals. A Structured Schedule is a comprehensive multi-week progressive training plan (e.g. 4 to 8 weeks) that prescribes specific workouts on designated days of the week, incorporates rest days, and scales workout intensity dynamically around your personal baseline resistance.
Q: What is Baseline Resistance and why should I calibrate it?
A: Baseline Resistance is your biomechanical reference gear ratio. Different rowing machines feature different flywheel resistances; calibrating your baseline ensures all scheduled workouts deliver the intended cardiovascular stimulus without overloading your lower back or breaking your stroke rhythm.
Q: My rowing machine does not appear when scanning for devices.
A: Ensure your rowing machine console is turned on and not actively connected to another mobile device or tablet. FTMS Bluetooth connections allow one central connection at a time. If needed, toggle Bluetooth off and on in your phone settings and retry scanning.
Q: The workout timer doesn't start when I tap Start Workout.
A: RowerCore includes a "Waiting for First Stroke" feature. The timer remains paused until you take your first stroke on the handle, giving you time to strap in comfortably.
Q: How does the Target SPM overlay work during a workout?
A: If a workout section specifies a Target SPM (strokes per minute), a circular HUD widget appears on the upper-left corner of the workout chart. It glows green when you are on target, orange if your stroke rate is too low, and red if you are rushing the slide.
Q: What happens if I miss a scheduled workout day?
A: RowerCore detects overdue workouts automatically. When you open the app, the Missed Training dialog offers you the option to catch up on the missed session immediately or continue with your scheduled calendar.
Q: Can I use RowerCore without an FTMS rowing machine?
A: RowerCore requires a Bluetooth FTMS-compatible rowing machine (or compatible console) to stream real-time stroke metrics, split times, power, and distance.
Q: Is my fitness and workout data sent to external cloud servers?
A: No. RowerCore values your privacy: all workout sessions, schedules, and profile metrics are stored locally on your device. Workout data is only shared externally if you explicitly enable Android Health Connect synchronization.
© RowerCore — Built by Vewello. All rights reserved.